So, you’ve got a whole drawer full of PS/2 port mice but you need a serial port mouse to hook it up to your vintage computer gear that predates the PS/2 era. You don’t see into spending absurd amounts of money on ebay for yet another mouse?
I’ve got you covered 🙂
We’ll hack up a PS/2 to serial mouse adapter based on an Arduino and some wires, caps and connectors. Stuff you probably have somewhere around in the lab…
Of course, we’ll not re-invent the wheel here – so we will re-use material that’s already out there:
- Arduino ps/2 mouse library from github: https://github.com/rucek/arduino-ps2-mouse – many thanks rucek for sharing!
- Arduino standard serial port library
- Serial mouse protocol information from Linux man pages: https://linux.die.net/man/4/mouse
With that all that’s left to do is to write a bit of glue code, wire things up and 3d print a case.
Materials
- 1 Arduino Nano or similar – probably any model will do as long as it has three digital and the serial pins
- 1 MAX232 level converter
- 5 electrolytic 1uF caps
- 1 female PS/2 connector
- 1 female DB9 connector
- Wire, hot glue, soldering stuff
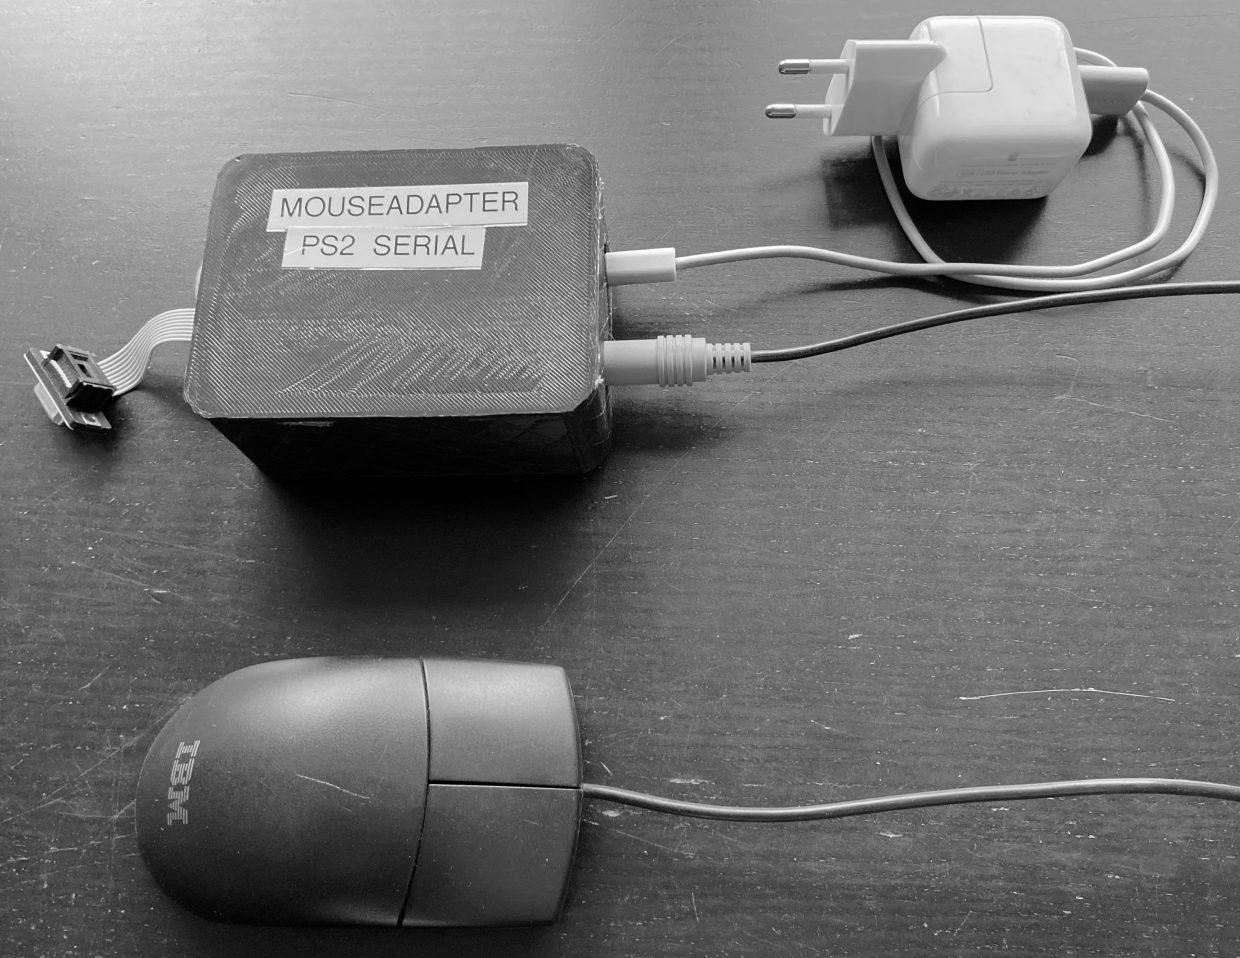
- Case – 3d printed or ready made. The one I used turned out much too large but once it was printed I didn’t want to waste it. Hot glue is your friend for making sure everything stays in there 😉
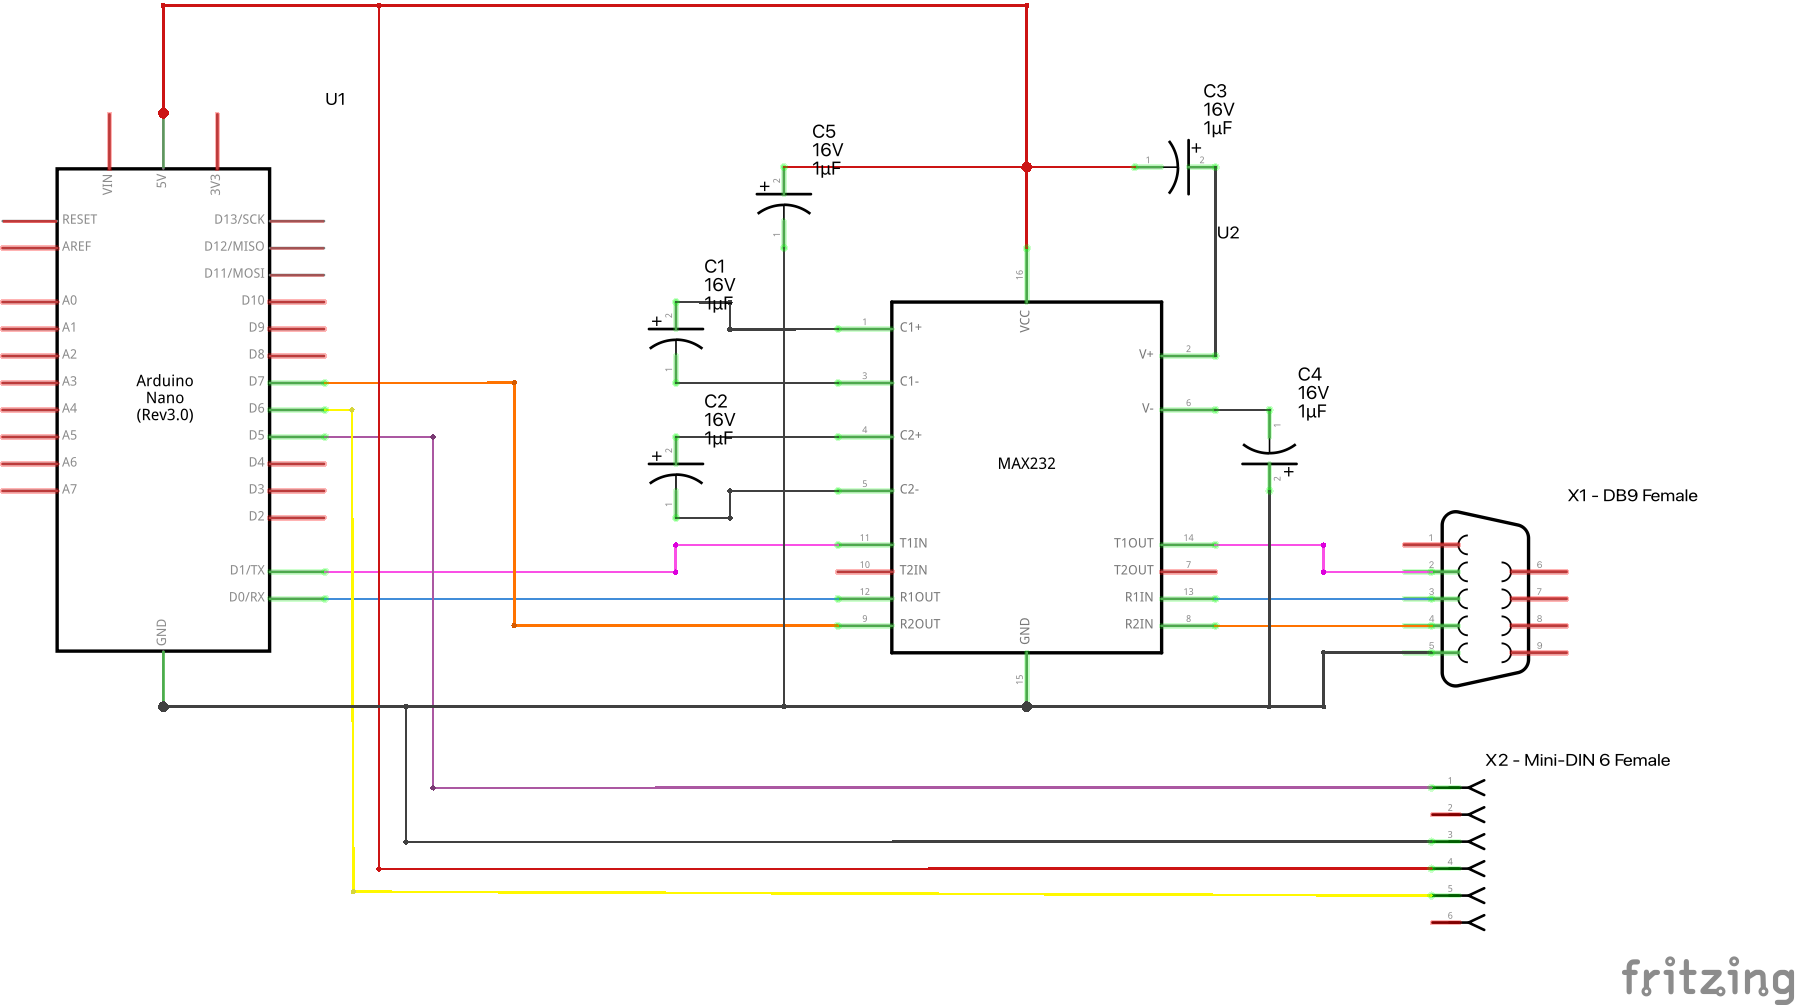
Wiring things up
We’ll wire up the PS/2 connector like so:
- PS/2 data -> Arduino Pin 5
- PS/2 clock -> Arduino Pin 6
- PS/2 +5 -> Arduino +5v
- PS/2 GND -> Arduino GND
Make a TTL to RS232 level converter based on a MAX232 chip. I wired it up as per the MAXIM application note, page 17:
- Arduino TX pin -> pin 11 MAX232 pin 14 -> serial DB9 port pin 2 (TX)
- Arduino RX pin -> pin 12 MAX232 pin 13 -> serial DB9 port pin 3 (RX)
- Arduino pin 7 -> pin 9 MAX232 pin 8 -> serial DB9 port pin 4 (DTR)
- Arduino +5V -> pin 16 MAX232
- Arduino GND -> pin 15 MAX232 -> serial DB9 port pin 5 (GND)
Apart from that, you need five 1uF electrolytic capacitors, connect them to the MAX232 as per the app note.
Arduino firmware
Below is the Arduino code that I hacked up quickly to speak to the mouse and the PCs serial port. The PS/2 portion is really simple thanks to the ready made code we got from github. Essentially, we’ll periodically query the mouse status and see if something changed since the last update.
The serial portion is a bit more involved, it essentially sends out data packets at 1200 Baud, N71 once a mouse event – movement or button – occured. However, there were essentially three different mouse standards at the time: Microsoft, Logitech and Mouse Systems. We’ll focus on implementing the MS mouse protocol since that’s widely supported by driver software.
The MS Protocol packs updates into a three byte packet as outlined below. It further specifies that the mouse should send a „M“ character a couple of milliseconds after init and that the mouse should initialize itself either when it receives a 7fh character from the serial line or the DTR pin status changes – this is why we need the DTR pin connected to pin 7. I didn’t implement the DTR reset initially, hoping it would just work but it doesn’t.
Once you’ve wired up your Arduino, download the PS/2 library from the github and load the example.ino file into the Arduino IDE, then modify as per the below and flash the device.
Connect to PC serial port, PS/2 mouse and 5v power, then load the MS mouse driver. You now should have a working serial mouse on your vintage machine.
/* https://linux.die.net/man/4/mouse */
/* https://github.com/rucek/arduino-ps2-mouse */

/*
 * Microsoft protocol

The Microsoft protocol uses 1 start bit, 7 data bits, no parity and one stop bit at the speed of 1200 bits/sec.
Data is sent to RxD in 3-byte packets. The dx and dy movements are sent as two's-complement, lb (rb) are set
when the left (right) button is pressed:
byte d6  d5  d4  d3  d2  d1  d0

1 1 lb  rb  dy7 dy6 dx7 dx6
2 0 dx5 dx4 dx3 dx2 dx1 dx0
3 0 dy5 dy4 dy3 dy2 dy1 dy0
3-button Microsoft protocol

Original Microsoft mice only have two buttons. However, there are some three button mice which also use the Microsoft protocol.
Pressing or releasing the middle button is reported by sending a packet with zero movement and no buttons pressed.
(Thus, unlike for the other two buttons, the status of the middle button is not reported in each packet.)
*/

#include "PS2Mouse.h"
#define DATA_PIN 5
#define CLOCK_PIN 6
#define RESET_PIN 7

#define MSB 0x40
#define LB  0x20
#define RB  0x10

#define LSB_MASK 0x3F

#define PS2MASK_MMB 0x04
#define PS2MASK_RMB 0x02
#define PS2MASK_LMB 0x01

#define MSB2_MASK (0x80 | 0x40)

PS2Mouse mouse(CLOCK_PIN, DATA_PIN);

#undef DEBUG
#undef DEBUGPS2
#define THREEBUTTON

// Mouse reset state tracking
volatile byte reset = LOW;

// PS2 State tracking
volatile byte prev_status = 0;
volatile byte prev_posx = 0;
volatile byte prev_posy = 0;

// On dtr change
void handleIntr() {
  #ifdef DEBUG
  Serial.println(pinValue);
  #endif
  reset = HIGH;
}

void initMouse() {
  delay(14);           // After 14ms send ...
  Serial1.write('M');  // Microsoft mouse designator
  #ifdef THREBUTTON
  delay(63);
  Serial1.write('3');  // ... Microsoft-compatible 3-button mouse with logitech extension
  #endif

  #ifdef DEBUG
  Serial.print("Mouse init.");
  #endif
  reset = LOW;
}

void setup() {
  #ifdef DEBUG
  Serial.begin(9600);  // USB Serial port
  #endif

  // Startup PS/2 mouse
  mouse.initialize();

  // setup reset by DTR
  reset = LOW;
  pinMode(RESET_PIN, INPUT);
  attachInterrupt(digitalPinToInterrupt(RESET_PIN), handleIntr, FALLING);

  Serial1.begin(1200, SERIAL_7N1);  // UART
}

/* Serial mouse packet encoding routine */
/* Encodes a 3 byte mouse packet that complies with Microsoft Mouse protocol */
void encodePacket(int8_t x, int8_t y, bool lb, bool rb, uint8_t* output) {
  uint8_t cx = x;
  uint8_t cy = y;

  output[0] = 0x40 |            /* Packet 0 (start packet bit)*/
    (rb << 4) | (lb << 5) |     /* Mouse buttons */
    ((cx >> 6) & 0x03) |        /* last 2 bits of X */
    (((cy >> 6) & 0x3) << 2);   /* Last 2 bits of Y */

  output[1] = cx & 0x3f;        /* Packet 1 ( first 6 bits of X ) */
  output[2] = cy & 0x3f;        /* Packet 2 ( first 6 bits of Y ) */
}

/* Two button mouse event */
void sendMSMouseEvent(int8_t deltaX, int8_t deltaY, bool lb, bool rb) {
  uint8_t packet[3];
  encodePacket(deltaX, deltaY, lb, rb, packet);
  Serial1.write(packet, 3);
}


void loop() {

    // Handle computer issued SW reset
    if ( Serial1.available()) {
      char ch = Serial1.read();
      #ifdef DEBUG
      Serial.println(ch);
      #endif
      if(ch == 0x7f) {
        initMouse();
      }
    }

    // Initialize mouse (controlled by interupt handler)
    if (reset==HIGH) {
      initMouse();
    }

    // Read PS2 Mouse data
    MouseData data = mouse.readData();

    #ifdef DEBUGPS2
    Serial.print(data.status, BIN);
    Serial.print("\tx=");
    Serial.print(data.position.x);
    Serial.print("\ty=");
    Serial.print(data.position.y);
    Serial.print("\twheel=");
    Serial.print(data.wheel);
    Serial.println();
    Serial.print("\tstate=");
    Serial.print(state);
    #endif

    // Send update if sth changed only
    if (prev_status != data.status || prev_posx != data.position.x || prev_posy != data.position.y) {
       sendMSMouseEvent(data.position.x, -data.position.y, (data.status & PS2MASK_LMB)>0, (data.status & PS2MASK_RMB)>0);
       // Microsoft implementation of 3rd button - send empty packet
       if ((data.status & PS2MASK_MMB)>0) {
         Serial1.write(0x03);
       }
       prev_posx = data.position.x;
       prev_posy = data.position.y;
       prev_status = data.status;
       #ifdef DEBUG
       Serial.println(".");
       #endif
    }
    delay(20);
}
You can download the whole project below: